Sunday, June 30, 2013

The Nine Month Project

This past week, my domestic excursions have been a bit limited.  I was in the midst of wrapping up a very important project that started last fall and ended this Wednesday morning (10 days excruciatingly behind schedule).  Of course, I am talking about the process of carrying and giving birth to our precious little girl. 
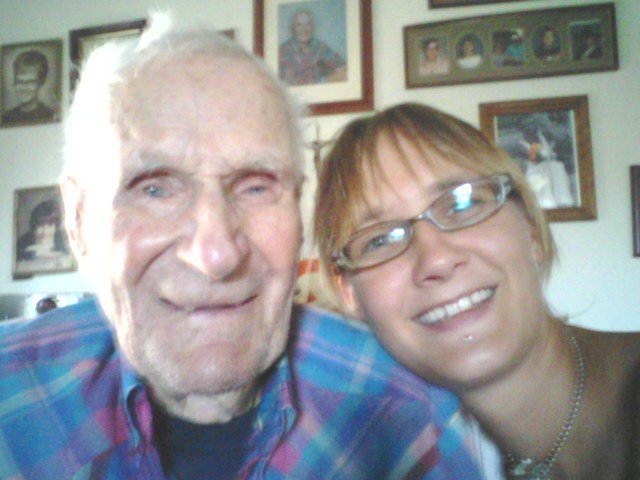
With my Superman and very pregnant

After four pregnancies one would think they had it figured out, but this experience was a completely different ride than any I've had before.  From the first weeks when I experienced morning sickness for the first time to the last week when I found myself laboring for nearly three times longer than in the past, this pregnancy was one of a kind.  It constantly turned me this way and that, leaving me with no idea what to expect. 

I take that back, there was one thing I did learn I could expect with this pregnancy: the love and understanding of my precious husband.  Every step of the way he was there with me, infinitely patient through the ups and downs, and totally on board with three am Icee runs.   Even when my labor wanted to spend three weeks starting and stopping at random intervals he patiently endured, reassuring me of his continual support. 

Mall walking and belly bound to induce labor naturally

 
At nine days overdue the midwives called the hospital to schedule a medical induction, but at the same time implemented some natural methods.  Believing that my labor was starting and stopping due to Miss Onyx shifting away from my cervix during contractions, they bound my belly with a sheet to limit her mobility.  They also suggested Suki's Blends Labor & Delivery tincture, a product available from one of our local herbalists.

A long mall walk and several hours later I started my sixteen hour labor that included a rather uncomfortable drive to Chapel Hill during the morning commute. Superman was incredible patient while maneuvering traffic and risking severe injury to his fingers in my grasp. Back labor in the front seat of a car is not something I recommend adding to your bucket list. 

One hour after reaching the Women's Birth and Wellness Center we were holding our little lovie.   Although I had not planned a water birth, I ended up having her in the bathtub when the midwife suggested it to help ease the discomfort of back labor.  The amount of relief it provided was absolutely amazing and I will be asking for the tub to be filled our next time around. 
 
Miss Onyx at two days old (her Papa wants you to know that I ruined this photo and she did not vomit all over herself)

 
This project wasn't quite what I expected when it begin, but it was incredibly successful and I learned a lot along the way.  The most exceptional lesson I was able to take from this whole experience wasn't taught by the midwifes or through the actual pregnancy process itself.  It was taught by the tenderness and care of my husband.  I learned what it is to truly be loved. 


Sunday, June 23, 2013

Hounds Tooth Boots

41 weeks pregnant and I am just too tired to do much of anything. I set the pieces for a little skirt out on the ironing board earlier this week and have done nothing more than look at them.  It's a simple project, but still too much.  Dishes and laundry are the extent of my activity this week....oh, and one batch of chocolate chip cookies to satisfy a killer craving.  Luckily, I do have a back up post to share.


As soon as I found out I was pregnant, I just had to sew something and came up with these little boots.  Luckily I am having a girl, so they will be worn!
 
 
In one afternoon, I made the pattern and two pairs of boots.  The pattern was created with MollyChicken's tutorial as a guide.  I followed her instructions for assembling the booties, but for future applications I will use my own method of attaching the lining (instructions to come if and when that happens).  

Tuesday, June 18, 2013

Hearts To You

"I'm home alone all night and having contractions.  What should I do?  Hummm...sewing sounds like a good way to pass the time."

This simple little upcycle dress with its matching headband took about two hours (counting bathroom and popsicle breaks).  The base of the dress was a long sleeved onesie handed down from my nephew (either he didn't wear it long or my sister is a laundry diva) and the skirt started life as a pair little girl's leggings. 

Monday, June 17, 2013

Not Miss Muffet

I love this versatile little design I came up with most recently.  It can be worn as either a sundress or a jumper depending on the season and sews incredibly easy.   The fabric was left over from Halloween and I picked it up for fifty cents a yard back in December.  I used the same tulle as for the first dress and once again, I fully lined the garment. 

Of course, I had to add a little bit of fiber art to keep things interesting.   

Friday, June 14, 2013

Let Him Eat Cake

Superman doesn't have much of a sweet tooth, but he does have a weakness for cake.  This past week, I indulged him with a White Sour Cream Cake slathered in Orange Butter Cream Icing.   Uncharacteristically , I followed the cake recipe exactly and used my basic butter cream recipe as a base for the icing.   The humidity was pretty high and started getting to my icing before I could get it in the fridge, but even messy it tastes amazing (if I do say so myself).

Orange Butter Cream Icing

1/2 cup butter (softened)
zest of 1 orange
4 cups powdered sugar
1/4 cup orange juice
 
Using a mixer blend the butter, orange zest, and powdered sugar in a large bowl.  Add orange juice and mix until creamy.  If icing is too dense, add more orange juice 1 tablespoon at a time until desired consistency is reached. 
 
Since I originally planned to use marmalade between the layers of cake, I only made one batch of icing.  When Superman nixed the marmalade idea, I didn't feel like making more so I scrimped on the inside layer.  For best results, when laying and frosting double recipe. 
 

Tuesday, June 11, 2013

More on Sourdough

After posting what I thought was a fairly thorough article on sourdough starter, I started thinking about all the little details I take as a simple matter of course when working my "doughs."  Since I want the best out come possible for anybody who attempts a starter, I decided to expand this topic a bit and add a few more tips. 

-When feeding the starter, use room temperature to lukewarm water.  Hot water can kill the culture and cold will slow down its activity. 

-To keep the sides of the sourdough crock clean, use a sharp knife to scrape the sides when you stir it down in the morning.  The dried scraping will fall into the crock and be incorporated back into the starter. These dried bits end up on the side of the crock because after feeding the bacteria works on the added ingredients and will raise the content level slightly before settling back down. 

-Always stir the starter gently.  It is a living thing and does not like to be radically disturbed.  One thing I always remember about my Grandpa was how slowly and methodically he maintained his starter.  Everything was done carefully, properly, and with love. 

-A forgotten feeding or stirring down is not the end of the world.  It's not a good habit to get into, but on occasion it will do little to harm the starter.  Just resume regular care as soon as possible.

-Any sign of mold or black scum on the starter is a red light.   Throw it away, sterilize the crock, and start over.  Between workings the starter will separate with the ticker starter below and a light brown liquid on top, this is normal.  Any nasty growth is fairly unmistakable and is usually accompanied by an unpleasant odor. 

-After spooning out the starter required for cooking, use a just laundered dish rag moistened in hot water to clean any starter that may have dripped on the rim of the crock.  Do not let the rag come in contact with the remaining starter. 

Grandpa and I, the last time I saw him. 


***Please note: since my last post on sourdough starter, my sweet hubby bought me a proper sourdough spoon. 

Saturday, June 8, 2013

Just Like Grandpa's...

My kitchen is starting to smell like sourdough!
 

Sourdough flap jacks were the comfort food of my childhood.  My grandpa made them every morning for over 50 years and even when he traveled his crock of starter rode along with him in a red Coleman cooler.  I have kept a starter myself off and on most of my adult life and now that I am once again settled in to a domestic existence, I just had to get one going again. 

Growing a starter is a process that to initiate takes 5-7 days.  It also requires adhering to a few simple rules.

  1. Use clean, preferably seamless, metal utensils.  The spoon in the photo is NOT ideal because of the rivets and seam that can collect bacteria you wont want added to your starter. 
  2. Keep loosely covered.  I use a square of clean, light weight cotton secured with a  rubber band.
  3. Don't neglect it.  Feed your starter every evening and stir it down every morning.  If you are not going to be using it at least every other day, store in the refrigerator and remove 12 hours prior to planned use. 
  4. Keep the sides of your sourdough crock clean. 
With those few things in mind, the only materials required to get started are a glass jar or crock with a loose covering, a clean metal spoon, flour, and water.  Any kind of flour can be used in a starter, but for the initial week I prefer rye since it is less likely to mold than other varieties.  After the bacteria has taken hold and my starter is going well, I switch over to all purpose white flour. 

Day 1:  Mix 1 cup of rye flour with 1 cup water in your very clean container.  Cover loosely and set aside for 24 hours.

Day 2-6:  Stir down and feed your starter 1/2 cup of flour and 1/2 cup water every evening.  Over the course of this week you will start to notice first a sour smell coming from your starter and then see some bubbling activity.  The consistency of the starter should be like thick pancake batter and the ratio of flour/water can be adjusted to obtain this. 

Day 7: Use 1-2 cups of your starter today!  Stir it down early in the day and remove what you want to use. Good first uses for sourdough include biscuits and bread.  I usually give two weeks before attempting flap jacks. 
Tonight feed your starter as usual, but switch to white flour if you have been using rye. 


A well cared for starter can live indefinitely and with all the fun recipes to try there is little chance you will grow tired of it's use.  

Friday, June 7, 2013

Homemade Wet Wipes


I have always been a cloth diapering mama, but this time around I have decided to use cloth wipes also. Might as well, I'm already washing diapers!

These 8x8 squares are simply cut from soft flannel using pinking sheers and then layered in a Rubbermaid container with a tightly closing lid.  After using up all the flannel scraps in my fabric stash, I purchased an additional yard (the pretty pink batik pictured) and was able to make 20 wipes.  When I am ready to start using them, I will wet them with a simple solution of baby oil, baby soap, and warm water. 

Wednesday, June 5, 2013

Her Heart Belongs to...

 
her Papa, of course!
 
Every little girl should be privilege to a serious case of hero worship. Rather she calls him Dad, Daddy, or (like at our house) Papa, she deserves to have the man of her dreams wrapped right around her finger. This dress is just as much for Papa as it is for Onyx.


For this epic first dress I chose a very classic 1950's silhouette with dark touches for a fun, rockabilly look.   It is fully lined with hand stitched hems and custom details.   


The main fabric of the dress is a cotton/spandex blend from a re purposed dress I wore only once and the lining is cotton gauze.  When I designed the dress I didn't plan to add a collar, but my design consultant (Papa) decided it needed one.  I painted tiny skulls on a remaining piece of the lining fabric and used an over layer of tulle to blend the bright pink with the overall design.  Heavy cross stitches hold the narrow collar in place and add to the rockabilly theme. 


For the key element of the dress, I painted a stylised human heart and the word "Papa" on white cotton broadcloth.  The applique is muted with three layers of black tulle and stitched on by machine. 


A rhinestone zipper adds a fun finishing touch and is stitched in by had for finesse.  All the hand work made this a labor intensive garment, but I couldn't be happier with the outcome!